- +91 844 9090 904
- info@maximumlearning.io
- Sector 62, Noida, 201309
Discover my simple 7-step portrait drawing system for drawing the human face
You have a passion for drawing the human face and using it to tell your stories, express your visions and draw portraits. This is who you are. It’s your calling and it’s deep, and I am here to guide you on your way to reaching your goals.
Discover my simple 7-step portrait drawing system for drawing the human face. In this course I am going to help you draw the face really believably in the style you choose and apply it to your career or personal visions. You will be able to do it quickly with purpose in a way that is clear and carries meaning to your viewers. At the end of this course you will have an awesome portrait for your portfolio that you can feel proud of and attract attention.
WHAT YOU GET
11 hours of On Demand video lesson content
2 portrait drawing demonstrations from start to finish
20 Downloadable resources to help you practice
Bonus lectures on anatomy, planes and tons of portrait tips from my years of professional experience
Full lifetime access
Access on mobile and TV
Assignments
10 articles
Certificate of CompletionArt direction secrets to make your portraits stand out
…and MUCH more
WHAT STUDENTS ARE SAYING ABOUT THE COURSE:
The first thing to say is that unlike some ‘art instructors’ Mr. Petrocchi is clearly an accomplished artist. He’s not simply some guy who’s always liked to draw, got a microphone for Christmas and thought it’d be cool to make a course. I regard myself as an exceptionally unexceptional draftsman but can already sense some improvement in the way I’m tackling portraits.The value I’ve already received leaves me with absolutely no complaints. You’ll be getting A LOT of information from a guy who knows what he’s doing with this course. And the demos – from blank sheet of paper to finished, fully rendered drawing – are both highly informative and inspirational. I’m not sure you can ask for more than that from any instructor. It’s a keeper. Many Thanks, Mr P for putting this together.
–Sam Pollard
Of all the elements of drawing, portraiture is one of the most difficult to master. Practice alone is not enough to create portraits that come alive. That is the core value of this course. It provides a strong foundation for the individual to begin to master the creation of portraits of substance. This is not a course for the lazy. It requires patience and practice. But it will provide a roadmap that will allow the student to create fulfilling and satisfying portraits.
–Stuart Givot
An Excellent Course. I was Impressed by Chris’s Level of Knowledge, Experience and Expertise. This course has differently give me knowledge that will help me improve my work and help me integrate into work with Charcoal.
–Aisha Smith
I was blown away of how great of a teacher Mr. Petrocchi is. He provided some incredible insights into helping me improve my facial drawing skills. It’s amazing of how easy and simple he teaches technique. I feel inspired and highly recommend his courses. I can’t wait to learn more from him!!!
–Tuese Ahkiong
Here is a clear, deep and well made course. Chris’s sense of art teaching is excellent, it’s like hanging out in his studio, looking over his shoulder (literally sometimes) and learning from following a professional. He talks out loud what goes on in his thoughts as he mindfully works his image. Seeing him work really helps me. His own career is used as an example, and I love all the personal stories that talk about his journey in the art world and specifically in this field of drawing portraits. The course is full of gold nuggets of info, stories, metaphors that help me put words and structure in my work. (I love the “Valley of the Suck” concept–so true! ) This course really helped me to clarify my work in regards to values. Also, it helps to come back to those foundations of the underlying structure of the face. I would recommend this course to anyone who wants to build a strong foundation and seriously wants to get into portrait art. As it is in my case, I would recommend it as well to any professional that wants to come back and touch those foundations again, one tends to forget stuff! Thank you Chris, and I agree “the figure is a song”!
–Philippe Ames
If you are ready to improve and go higher than you ever thought you could with your portraits then this course is for you!
See you inside,
Chris Petrocchi | Draw Juice studio
#portrait #portraiture #drawing #draw #human #faces #beginners #pencil #charcoal
To get started please download and read the attached resource with instructions or just read the instructions printed below:
Pre-Instruction Drawing Assignment | A walk into the unknown
To get started you will make a record of your current drawing skill level.
This is super valuable, and it gives you a keepsake and reminder of just where you
started this journey. It will be something you can go back to later and compare your later drawings
with to see your progress. If you are an experienced artist this might be
easy for you, but if you are a beginner it might be both scary and
exciting. Let me encourage you to jump in with both feet because the
you do the earth will move beneath you to support your next step!
Expect it to be awkward but do it anyway. You will learn a whole bunch
I promise :) After you have been drawing for a while you will forget
where you started, and this will be an encouraging and realistic reminder
of your progress.
What you'll need:
• Paper to draw on—plain white bond paper or 9” x 12” charcoal paper
is fine
• A #2 writing pencil, 2B pencil or charcoal pencil
• Your pencil sharpener
• A small mirror, about 5" x 7", that could be attached to a wall,
or any available wall or door mirror
• A drawing board or something to use as a drawing board—a
breadboard or a sturdy piece of cardboard,
• An hour to an hour and a half of uninterrupted time
What you'll do:
You will do two drawings. This usually takes an hour and a half to do,
but feel free to take as long as you wish for each of them. First are the
drawing titles and then the instructions for each drawing follows.
• "Self-Portrait"
• "A Person, Drawn from Memory”
Pre-instruction drawing #1: Your “Self-Portrait”
1. To provide a better drawing surface draw in your drawing pad or tape a few sheets of paper to your drawing board and
draw on that. This will cushion the surface and will be nicer to draw on than a harder surface.
2. Sit at arm's length (about 2 to 2+1/2 feet) from a mirror. Lean your board up against the wall or counter resting the bottom
of the board on your lap.
3. Look at the reflection of your head and face in the mirror and draw your "Self-Portrait."
4. When you have finished, title, date, and sign the drawing in the lower right-hand or lower left-hand corner.
Pre-instruction drawing #2: A person, drawn from memory
1. Call up in your mind's eye an image of a person—perhaps someone from the past or a person you know now. Or you
may recall a drawing you did in the past or a photograph of a person well known to you.
2. To the best of your ability, make a drawing of that person. You may draw just the head or a half-figure
3. When you have finished, title, sign, and date your drawing
**If you are a beginner please be gracious with yourself and don’t criticize the drawings harshly. Remember that these
drawings are done without any instruction. Just look for the areas you did well and congratulate yourself. You just hit it out of
the park!! Buy yourself a treat, get your favorite coffee or yummy snack–something that will make you feel good. If you have
more experience go ahead and notice the things you did well as well as the areas you could improve. Don’t forget
to treat yourself too :) The rewards are important so don’t skip them!
I can’t wait to see your progress so let’s get started!
TRADITIONAL PORTRAIT INSTRUCTIONS Printed here for your convenience
(See attached .pdf file for download)
A high profile client has hired YOU to draw their portrait. This is
your time to shine and do the best portrait you have ever done!
Due: by the end of the course.
Here are your instructions:
A. From the list below choose the kind of portrait you want to do from 5 different options.
B. Find a model and choose the pose, lighting, and clothing. You are free to
take a photo of the model or work form life.
C. If you can't find a model you can find a reference photo online that inspires
you and work from that.
D. To be done on 18” x 24” white or toned charcoal paper using charcoal or
pencil. Half body from the waist up and close ups are permitted. No full
body compositions.
PORTRAIT STYLES TO CHOOSE FROM
1. TRADITIONAL PORTRAIT
Traditional or Classical portraiture would refer
to an image where face is the predominant
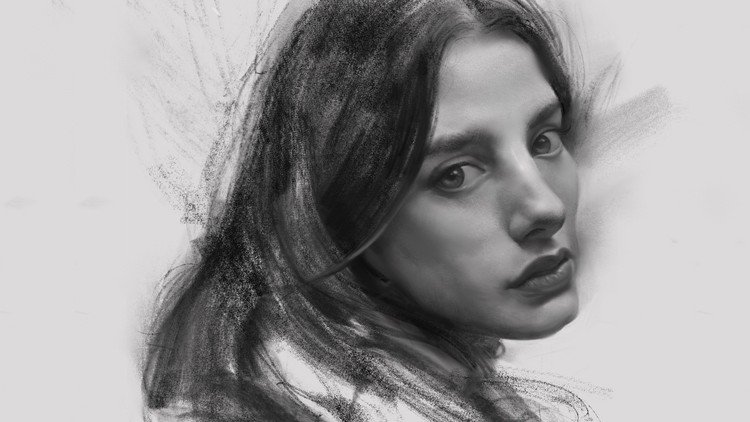
element like this portrait I drew of my friends
daughter. As the art director I set up the pose
and controlled the lighting to get the look I
wanted. The purpose of the photograph is to
depict visual representation of that person.
Subject can be looking directly at the camera
or have a 3/4 view. With what is described as a
head-shot, two thirds framing can be used.
2. ENVIRONMENTAL PORTRAIT
The term Environmental Portrait refers
to an image where the subject is
photographed in person’s natural
environment like this farmer by
photographer Jonathan Bielaski.
Additional examples could be: a worker
photographed at the construction zone,
teacher in the classroom, sculptor in a
sculpture studio and so on. Surroundings are used to compliment the
subject and to emphasize his character.
3. CANDID PORTRAIT
A candid portrait is taken
without a subject expecting
or acknowledging the
photographer like this
waitress in a coffee shop.
This style used in photo
journalism, travel
photography, street
photography and event photography. As opposed to an environmental
portrait this image is captured at the moment rather than set up.
4. GLAMOR PORTRAIT
The term Glamor Portrait refers to portraits where
emphasis is given to highlight the sexy romantic
appeal of the subject. The lighting is usually soft
shadows, with even, bright lighting. Think
Hollywood movies and fashion magazines.
5. LIFESTYLE PORTRAIT
The term Lifestyle Portrait refers to portraits where emphasis is given to
suggest the “style of living” of the individuals. Technically it is a
combination of environmental portrait and candid
portrait. More weight is given to communicate the
feeling of life experience of the subject. Usually
found in commercial and fine art photography.
The editorial, fashion, pharmaceutical, and food
industries often use lifestyle images to evoke
emotions in viewers by depiction of desired life
styles. It is common to see this style used in
wedding and family portrait photography as well.
PROPOSED SCHEDULE (be done as you move through the course)
Week 1
Look at the material and think about which kind of portrait you want to
make
Week 2
Decide on which portrait you want to do and commit to it.
Start doing research and get your creative juices flowing.
Week 3:
Gather reference, make notes, and think about a lighting strategy to best
show your portrait. Look at the Photoshop file with lighting strategies to
help you show your model in the best way as well as convey any emotion
that you think might help describe who the person is.
Find the .psd file called “Creative portrait lighting for artists” to find
lighting strategies and their emotional applications for portraiture.
You can watch my video on 7 different creative lighting set ups for artists
here: https://www.youtube.com/watch?v=OSLXJePJd24
Week 4
Do 3-5 thumbnail drawings at the beginning stage to explore how you
want to compose and light the model. Thumbnails are very small drawings
(2 x 3 inches) that show the most essential information about the character.
You can use line or tone for this. Keep it very simple focusing on proportion
and light and dark areas. Don’t use too much detail.
Go here for some helpful hints on the thumbnail process:
https://www.pinterest.com/pin/564638872011970206/
Week 5
Start your final drawing. Be careful to draw lighting and check your
proportions carefully. Make sure your construction is valid.
Week 6, 7
Continue working on your portrait. Put in the values to build the tonal
structure. Make sure your connections and construction are valid.
Week 8
Turn in you final portrait. You did it, congratulations!!
Joining the community is a great way to share and get feedback of your work, or just some motivation from fellow students and artists. There are two groups to choose from.
You can join the Facebook group here: https://bit.ly/2D2AFl0
You can join the Discord group here: https://discord.gg/tMMj3Xh8ye
I hope that you will find this course to be very rewarding for your portrait drawing journey. If in the unlikely event that it is not to your satisfaction, please let me know at chris@drawjuice.com and I will do my best to improve it make it a better experience for you.
Believe in yourself and trust the process as you make your way through the course. Stay with it until you have completed your best portfolio piece ever.
I am excited to see what you can do! Reach out to me/message me if you get stuck or need me for any reason!
Kind regards,
Chris Petrocchi | Draw Juice Studios
https://www.instagram.com/drawjuice/
https://drawjuice.com
Course Study Plan (printed here in case you can't download it)
Bootcamp Portrait Drawing Course
Module 1
SEE and CONSTRUCT
Your first drawing: The first drawing which is a “pre Instruction” drawing of a self portrait in
charcoal. It is a “Memento” drawing–a snapshot of where you are now in our artistic process.
Please find the “Pre-Instruction Drawing Assignment” document and follow the instructions
Buy a sketchbook about 9 x 12 inches in size. There are many different kinds out there. I
recommend one that can open up and lay flat so it doesn’t keep trying to close while you are
drawing.
Your portrait masterpiece. Download and read the assignment descriptions. At the end of
this course you will have your very own professional portrait masterpiece for your portfolio.
Look at the material and think about which kind of portrait you want to make. Decide on
which portrait you want to do and commit to it. Start doing research and get your creative
juices flowing.
Practice seeing like an artist using the squint and compare technique when you are looking
at things throughout the day. Especially use it when you are drawing. In your sketch book do
10 drawings small drawings (5 per page) that look like flat 2D puzzle pieces that interlock and
form a picture like in the “Lighting" and “Bad Xerox” videos. Fill in the darks and keep it
simple!
Download the Planes of the Head Template Practice file. You should consider practicing
the Plane Head and Rhythm Head templates a half a dozen times or so over the length of the
course. It can take that long for it to get into your muscle memory. Once it is there your head
DRAW JUICE - PORTRAIT DRAWING !1
drawing skills will improve dramatically!
Sketch in your sketchbook from life or from photos for 15-30 minutes if you can manage it.
Module 2
ACTION and FORM
Practice drawing the head in profile with the triangle shape. Do a 2 minute practice
session for 14 minutes. Then do a 5 minute practice session like I demo in the video for 15
minutes.
Continue your portrait. Gather reference, make notes, and think about a lighting strategy to
best show your portrait.
Find the .psd file called “Creative portrait lighting for artists” to find lighting strategies and their
emotional applications for portraiture to help convey who the person is more clearly to you
and your audience.
You can watch my video on 7 different creative lighting set ups for artists here:
www . youtube . com/watch?v=OSLXJePJd24
Do 5-10 thumbnails and work out the composition, lighting and proportions. Do 5-10 small
thumbnail drawings at the beginning stage to explore how you want to compose and light the
model.
Thumbnails are very small drawings that show the most essential information about the
character. You can use line or tone for this. Keep it very simple focusing on proportion and
light and dark areas. Don’t use too much detail.
Draw the planes of the head from the Front view as in the demo video. This can be done
DRAW JUICE - PORTRAIT DRAWING !2
in charcoal or digitally. Try doing this a few times over the week to get it into your muscle
memory.
Draw the head from the Three Quarter view as in the Charcoal demo video. It can be
done
traditionally large or small in size, or you can do it digitally. The important thing is to just do it
and get the hang of it.
Module 3
the FEATURES
Draw the features from the 5 different positions on 8.5 x 11 inch paper or in your
sketchbook or Photoshop. Use the homework reference worksheet as a guide.
Continue drawing your portrait. Try to orchestrate your portrait so all the elements come
together in a compelling way like a conductor in a symphony to delight and entertain yourself
and your viewers. Post your progress to the Facebook group to get feedback and
encouragement.
Sketch in your sketchbook from life or from photos for 15-30 minutes each day.
Module 4
OBJECTIVE and LIGHTING
Grab the practice files and do both the Conscious Learning and Improving Your Visual
Memory assignments
DRAW JUICE - PORTRAIT DRAWING !3
Continue to work on your portrait: Start your final portrait drawing. The exciting part is
here! Remember to stick with your plan and see it though. Continue to Post your progress
to the Facebook group to get feedback and encouragement.
Start the drawing very lightly in the block in phase as in a blue print to get it on the paper.
When you draw lightly it’s much easier to correct mistakes and change things.
Consider using an H or HB pencil or charcoal for this because it is easier to draw lightly with
and easier to erase than the softer B pencils. Check your proportions carefully.
Make sure your construction and connections are valid. Refer to my charcoal demonstrations
on how to do a block-in to get it on the paper.
Don’t rush it-take your time! Commit to your plan and be determined to see it through. You
can do this! !
Go here for some helpful hints on the thumbnail process:
https://www.pinterest.com/pin/564638872011970206/
Module 5
DRAW JUICE - PORTRAIT DRAWING !4
DRAW and DESIGN
Continue on your portrait drawing and bring it to a conclusion. Remember to stick with
your plan and see it though.
When finished post your final portrait not the Facebook group to wrap it up.
You’ve done it, congratulations!! You climbed this art mountain and you can be very proud
of yourself.
I wish you continued success in your art journey! Now is a good time to go back and revisit
the first drawing that you did before starting the class. It was the self portrait remember? No
doubt you have come a long way in a short time. Give yourself credit and a big pat on the
back for ANY progress that you made–it’s really important for you to do that. Treat yourself to
something meaningful to celebrate and follow through with it, you are worth it!
Remember to keep creating and never give up!
Sincerely,
Chris Petrocchi / Draw Juice Studios
In this portrait drawing demonstration I will show you:
• an efficient approach to portraits based on shapes and how to design them
• the crucial skill of squinting and comparing to simplify complexity
• how to work from the general to the specific to get great results
• spacing and placing the elements
• finishing a drawing
...and more
Find the reference photo resource attached below to do this lesson. Or, find your own photo to work from that suites you.
This lesson contains 3 videos on the planes and rhythms with actionable practice templates.
In the first lesson you will discover:
• a brief history of the the planes and rhythms of the head
• the power the planes and rhythms and how leveraging them helps you simplify the complexity of the human face
• how it helped me more quickly create hundreds of character designs for the Godfather game and many other game related projects
In the third video:
• I show you how to easily use these 2 ideas to come up with believable lighting on the fly increasing your creative potential
In the second video:
• I do a quick recap on value along with the concept of squinting and comparing to simplify what you see in front of you
• then we get our hands dirty as I show you how to practice the planes and rhythms as I talk you through the whole process from start to finish
• Finally, I analyze some Andrew Loomis head drawings and uncover how he uses the planes and rhythms to make his drawings look solid and believable
• To watch a drawing demo on the Reilly Rhythms go to my Youtube channel where I show it in front side and 3/4 views. it's fast but clear and should help you understand the rhythm chart better. It's here: https://youtu.be/bGjZlc-RMXs
In the third video:
• I show you how to easily use these 2 ideas to come up with believable lighting on the fly increasing your creative potential
The reason why people struggle with drawing faces is because they haven't mastered the basic structure of the head. The two main tools available to solve this problem are the planes and rhythms of the head, and most people struggle with the rhythms. In this 1 hour long tutorial a unique approach is taken that combines both planes and rhythms into one powerful force multiplier that is easy to understand. Begin putting it into practice right away and watch your drawings improve dramatically. Very effective for portrait drawing, painting and character design.
In the last lesson I demonstrated how to use the Reilly Rhythms to block in a head. We will build on rhythmic underdrawing with a solid planar drawing over the top that will finalize the block-in stage.
Here I'll be using the Asaro Plane Head devised by famed figurative artist John Asaro, to help himself and his students to visualize and understand the structure of the head.
Do this for about a week and it will get into your muscle memory and have a better chance of staying there.
In this 2 video series you will discover:
• the two powerful criteria for drawing the head fast and efficient in profile and 3/4 quarter views
• how drawing fast gives you four distinct advantages and what they are
• the one SIMPLE SHAPE that helps you design your portraits and gets you the head in profile PLUS 3/4 front and back views just by where you place the ear
• drawing demo: 2minute poses
In this 2 video series you will discover:
• the two powerful criteria for drawing the head fast and efficient in profile and 3/4 quarter views
• how drawing fast gives you four distinct advantages and what they are
• the one SIMPLE SHAPE that helps you design your portraits and gets you the head in profile PLUS 3/4 front and back views just by where you place the ear
Practice drawing with me: 5 minute poses
ASSIGNMENT 2:
part 1 Complete the attached step by step Profile of the head drawing practice template. There are lots of steps to this so watch the video and do it with me if needed. Post your results to the FaceBook group.
part 2 See if you can construct your own 3/4 head from below looking up at it. This angle is quite a challenge so if you are looking for one this is it! Good luck!
The reason why people struggle with drawing faces is because they haven't mastered the basic structure of the head. The two main tools available to solve this problem are the planes and rhythms of the head, and most people struggle with the rhythms. In this 1 hour long tutorial a unique approach is taken that combines both planes and rhythms into one powerful force multiplier that is easy to understand. Begin putting it into practice right away and watch your drawings improve dramatically. Very effective for portrait drawing, painting and character design.
Written steps for planar block in of the head from the front for your convenience. Keep it at your side when you practice to help you reinforce the whole process.
In this video I analyze the head in 3/4 view showing the important landmarks you need to know in this position
In part 2 of the head in 3/4 I continue with the analysis with many helpful tips to help you handle the head from this complex position
Assignment: You will do a head in 3/4 drawing and post it to the Facebook group
In this video you will discover how to accurately describe the head in 3/4 view as you watch me draw over my shoulder as if you were in the studio with me. You'll know the proportions of the head and exactly how to construct it. I'll show you a simple trick to get the face on the paper with ease and accuracy from this point of view. I will describe and show every plane clearly and with excellent technique so that you can begin to do it in your drawings right away giving you that sense of confidence you need to progress. Use the downloadable resource showing the step-by-step instruction on drawing the head in 3/4 view along with the video demo to practice with. Make a drawing and then post your results to the Facebook group. Let's do this!
In this lesson on values modeling effects you will:
• discover a clear definition of value that will be useful to you as an artist
• understand local value and how to apply it
• the one idea in plain sight that helped me with value
• Discover how light reacts with objects making them appear 3D
• 5 simple but significant attributes about the laws of light that will help make your drawings instantly appear more 3D and realistic (it's not magic)
...and more
In this lesson I will demonstrate a 5 value scale in vine charcoal and charcoal pencil, and then apply it to a simple sphere.
This 5 value system will help you identify value and see how to apply it to a simple sphere.
**Do this assignment and post it in the group.
Continuing from the previous lesson on the 5 value scale I will demonstrate a clear step-by-step method on how to use it to transform 2D shapes into 3D forms.
You will learn exactly where to put each value and in what order to make a sphere, cube, cylinder and a cone. These are the basic building blocks of of form, and once you can render these shapes you will be able to move on to the more complex compound forms you will encounter in the human head.
I will explain/review modeling effects and the anatomy of form from lecture 27.
**Do this assignment and post it in the group.
In this final lesson on the 5 value system I will build on what we learned in the previous 2 lessons and apply it to drawing the head.
I demonstrate a rough head drawing and map out each value showing you the exact order and placement of each one. This is a very helpful and practical exercise, and one you really need to do for yourself to make the gains you desire.
**Do one of these heads and post it in the group for feedback. Use the reference provided or find a photo of your own. Remember to use single source lighting with good separation of light and shadow.
Here are the steps:
Block in / gesture of the head
Map shadow shape and fill in with value 4
Add value 2 to the light side with vine charcoal
Lock shadow shape with HB charcoal pencil
Add mid tone value 3 to light side with vine charcoal
Edge control with HB charcoal pencil (this will darken and soften the edges usually)
Add value 1 for highlights
Add value 5 to shadows
Refine light side of the head
In this video demonstration you will:
learn how to draw with confidence
become a sculpting drawer and transform your drawing from flat, 2D and unconvincing to that pops off the page and grabs your audience
specific mark making techniques that hep you master charcoal
...and more
In this video demonstration you will:
learn how to draw with more confidence
become a sculpting drawer and transform your drawing from flat, 2D and unconvincing to that pops off the page and grabs your audience
specific mark making techniques that hep you master charcoal
In this 2 video lesson you will discover and understand:
• the 4 essential edges that will help transform your drawings from 2D to 3D
• how to use those edges for maximum impact
In this 2nd video demonstration you will discover and comprehend:
how to identify the various kinds of edges on the face
the 4 essential edges that will help transform your drawings from 2D to 3D
how to use those edges for maximum impact
I explain and demo the basic construction and anatomy of the eyes
Photoshop demo of various eyes in the style of John Vanderpool. Find out more this excellent draftsman of the late 1800's here: https://en.wikipedia.org/wiki/John_Vanderpoel
Narrated and sped up I show you how to block in an eye in charcoal just like the old masters. Come over my shoulder and check it out!
In this demo I show you the basic anatomy of the mouth
Mouth demo on Photoshop in the style of the late John Vanderpool. I talk a lot about construction and technique in this lesson
Drag file here or click the button.